Diferencia entre revisiones de «Scratch/Kinect2Scratch»
De WikiEducator
< Scratch
| Línea 33: | Línea 33: | ||
|Title=Acción!}} | |Title=Acción!}} | ||
| + | |||
| + | |||
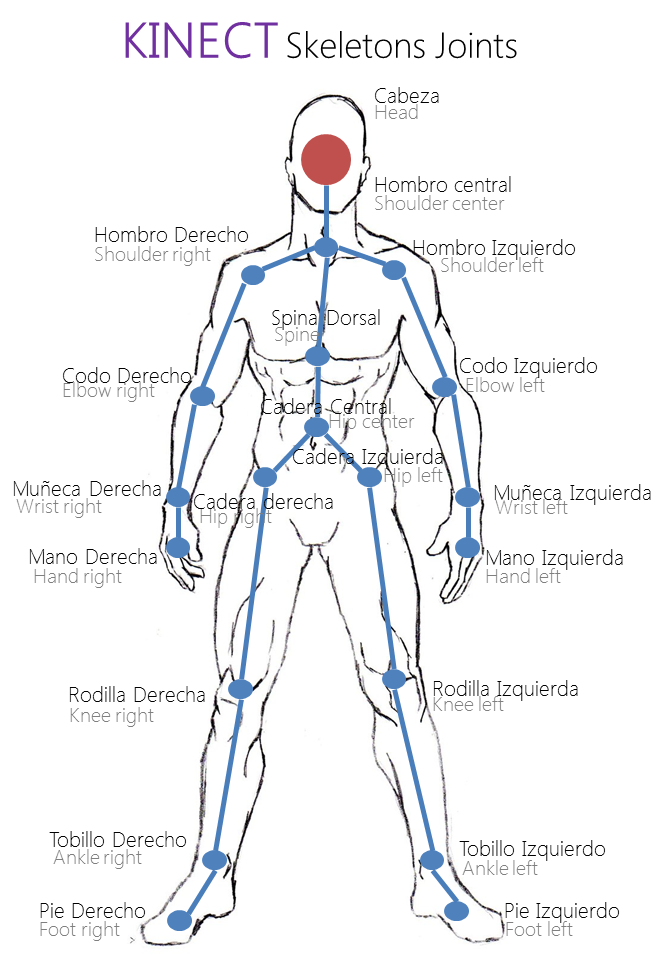
| + | [[Archivo:EsqueletoKinect.png]] | ||
Revisión de 10:56 24 may 2013
| Trabajo en proceso, espera cambios frecuentes. Tu ayuda y retroalimentación son bienvenidos. Ver página de charlas. |
|
|
|
i. In Kinect2Scratch: a. If you want 3D and 2 Player mode, click Configure Skeleton and tick them on b. Click Launch Kinect, wait for video to appear c. Click Connect to Scratch d. Adjust your Kinect so that you can easily stand in front of your Kinect e. Stand in front of your Kinect, it must see your whole body i. You need lots of room, clear your furniture away! ii. Only one person at a time (later add another) iii. No direct sunlight! f. If the left hand video shows your shape in red, it has detected you g. Now go back to Scratch and follow the next section
|
